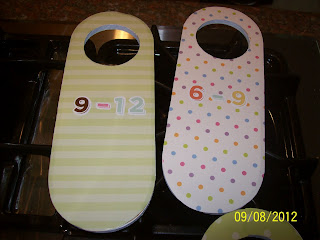
As soon as I heard that my super organized friend "M" was having a baby, I knew this was one project I had to complete! Off I ran to Hobby Lobby to pick up four wooden door hangers...I did some research and found the lowest prices and the best quality at Hobby Lobby. If you are planning on trying out this project, be sure to buy the thicker door hangers that are priced at .99 cents instead of the thinner at .79 cents!
You will also need scrapbook paper, number stickers, Mod Podge, acrylic paint, scissors and foam craft brushes to complete this project.
Step 1...trace your wooden door hanger onto your scrapbook paper and cut out
Step 2...Paint the back and sides of your wooden door hanger with your choice of acrylic paint
Step 3...Once your hangers have completely dried, add a generous layer of Mod Podge to the front of your hangers and the back of your scrapbook paper. Carefully line up your scrapbook paper with the hanger and smooth out the paper to avoid bubbles. Let dry for at least an hour.
Step 4...Add your number stickers to indicate the clothing sizes. I used 0-3, 3-6, 6-9 and 9-12 months. Once you have placed your stickers, apply a generous layer of Mod Podge to the front of the hanger. You will want to repeat this process several times...I added a total of three layers of Mod Podge to the front. Make sure to again wait at least an hour in between layers to allow for drying time.
Ta Da!! The finished product!
P.S. In case the opening of your hanger is not large enough to fit your closet bar, add a strip of ribbon that can be tied onto the closet bar!


These are so cute Hooch!! If only I was that organized.....
ReplyDeleteThese are really cute! We are going to be heading into the 3-6 months clothes before long, I think. I had NB-12 months organized in my little one's closet. I'm pretty good at it considering this is girl 3 for me! haha
ReplyDeleteNice work!! Where is Hobby Lobby?
ReplyDeleteHobby Lobby is in Robinson Twp! In the same plaza as the GetGo :)
ReplyDeleteWhat a fantastic idea!
ReplyDeletex