Friday, November 30, 2012

My 2013 Thanksgiving Goal

I just want to start out by saying this post is totally self serving and for my benefit only, but it will be my motivation to get things done.  And also after Thanksgiving last week, and Bug and I having coughs that we can't seem to shake, I really haven't done anything interesting or post worthy in the last week.  So here we go: My goal for next Thanksgiving is to cook it myself and host it at my house. But here is the important part, in order for me to do this I need to have my house rearranged and set up more efficiently.  Honestly, I am not kidding when I say my house looks exactly the same as when we moved in over 4 years ago.  I have not changed anything...well except my bathroom (go me!).  But I think its time for a change, and I'm ready for it. 

The first room I want to change is the family room/dining room. This is the biggest room in my house and one of the main reasons I bought the house. Right now it is our main room. We spend probably 90% of our day in this room, and that is because we play, eat, and watch TV in this room. Here it is:


Believe it or not I actually did straighten up before I took these pictures!  It is always a mess though! Anyway, it really is a great room, I just don't think I'm taking advantage of the space.  So the first thing I need to do is get all new furniture-couch, chairs, end tables-just because that stuff in there is all old and was given to me when I moved in.  Next I want to turn the part of the room that currently has the table and chairs into Bug's play area.  Right now her toys are all smashed into the corner of the room. 


They are actually spreading into the mudroom, which I would like to fix up too, and maybe get a bench for.  I'll ask B to help me with that!!

So if I do that you might be wondering where we'll eat, well I have a living room that can be turned into a dining room.  This room is practically unused and pretty much a waste of space.


The only time I'm in this room is right now while I'm typing this, because that is a computer desk off to the right.  I think it is big enough to house my table and chairs and hopefully a few other dining room pieces.

So there you have it. Now you all know my plans and if I don't follow through I'll look like the slacker of the year.  Hopefully I will post updates as I make progress. I really am hoping to have all this accomplished by this time next year.  Feel free to give me encouragement or a good kick in the butt if you see me slacking!

Now I'll just have to learn how to cook a turkey!!

Wednesday, November 28, 2012

DIY Advent Calendar

This year, I decided to make an advent calendar for my kids.  Although we do have an advent calendar that counts down the days until Christmas, I surprisingly have never purchased one of those cardboard advent calendars where you get a piece of chocolate for each day.  And as exciting as it is to count down the days until Christmas, it's even more fun when you add chocolate!  The nice thing about making your own advent calendar is that it is reusable.  And every year, you can choose something different (or not) to put inside the bags.  For this Christmas season, I decided to use hershey kisses! (I also wanted to add a Bible verse for each day, but time would not allow it!  That may be next year's addition!) 


What I used:
24 Muslin treat bags
24 assorted chipboard forms (ornament, reindeer, snowflake, snowman)
acrylic paints (red, white and green)
small spongebrush
number stencil
black sharpie
Christmas hershey kisses
cork board
straight(sewing) pins
small hole puncher

*The chipboard forms were found in the dollar bins at Michaels, 12/$1.  The Muslin treat bags were found in the wedding aisle.

I started by putting a hole in the top of each chipboard form, and then painted each one using the acrylic paint and a small spongebrush.  I painted both sides, waiting for the first side to dry before painting the other side. (They dried fast, about 10 minutes)


Next, I used a number stencil and a black sharpie to number each bag 1-24.  *Note: Make sure you place a piece of thick paper or cardboard inside the bag when you write the number to avoid the black ink bleeding through to the back side of the bag.


Once the chipboards were dry, I untied the string on each treat bag, slid the chipboard form on the string, and reknotted it.  I filled each bag with 2 hershey kisses (one for each of my kids).


Without taking exact measurements, I laid out my treat bags on the corkboard to figure out the best spacing and how many to put in each row.  I made 4 rows of 6 bags.  I placed the pins in the corkboard to hang the bags. (The nice thing about using pins and a corkboard is that you can move them if needed.)
 
And that is it!  With a little bit of time and effort, you can make your own advent calendar to enjoy for many years to come!


By the way, if you enjoyed Hooch's post about the Festival of Trees, I will be posting next week a tour of the festival of trees at Casa de B!  : )

Sharing With...

The DIY Showoff

Savvy Southern Style

Jennifer Rizzo


Monday, November 26, 2012

2012 Festival of Trees

Happy Monday! I hope you all had a wonderful Thanksgiving holiday! We had a nice couple of days off work with time to spend as a family. We host Thanksgiving at our house so we had lots of prep work to do the night before and lots of cooking to do on Thanksgiving day! A big shout out goes to my husband and Mom as they prepped all of the food for me Wednesday evening while I sat in real estate class until 10 pm...I definitely wouldn't have been as prepared or relaxed on Thursday without their help!

After the craziness of the holiday and black Friday shopping, we decided to kick off the Christmas season with a trip to our local festival of trees. This is an annual event with all proceeds going to charity that allows local businesses to sponsor and decorate different Christmas trees. Take a look at some of the trees that were a part of this year's festival!


This was a white tree that was decorated in the theme of snowmen!


This was my favorite tree at the festival. This picture in no way does it justice...the tree was all white decorated with gold and silver. So pretty!


This next tree was decorated with purple and crystal accents. I liked the tree topper that looks like it is exploding out of the top of the tree.


This tree was super fun...decorated with red and green polka dots and glitter. If you look closely, you can see that the tree topper is actually a glitter top hat.


Finally, this last tree was decorated in a very traditional way. Most of the tree was made up of poinsettias and the bottom of the tree was decked out with Christmas carolers.


I had to end with this picture of my daughter and Rudolph. Last year she was a little weary of the characters walking around at the festival, but this year was a completely different story. She pretty much stalked Rudolph and Frosty all over the building, and at one point she actually pulled Rudolph's tail! Too funny!

I hope you enjoyed the festival of trees! What holiday activities or events do you attend with your family? Let us know in the comments!


Tuesday, November 20, 2012

HSB's Random Thankful List

With Thanksgiving just days away we thought we'd let all our wonderful readers know a few things that we are thankful for for each letter in "Thanksgiving".  Here we go:

   T-Target (best place to shop!)
   H-HSB (and I know you are all thankful for us too!)
   A-Alcohol (and we deserve a drink after a long day)
   N-Naptime (aka quiet mommy time)
   K-Kahlua Pie (from On The Border. Try it, you won't be sorry!)
   S-Sleep (never enough)
   G-GPS (where would we be without it? Probably North Dakota or Vermont)
   I-Indoor Playgrounds (Thank you Chic fil a)
TV-(obviously)
   I-Imodium AD (for too much OTB)
   N-Nick Jr. (keeping our kids occupied for hours)
   G-Glue gun (can't craft without it)

And here is a special sneak peek of our notes from our last super formal business meeting where we came up with this list.


Yes, that is our list written on an official On The Border napkin.  If you look closely you can see where I wiped the salsa off my mouth!  That's just how HSB does things!

Anyway, seriously we are thankful for each and every one of our readers! What are some things you are thankful for this Thanksgiving?

Friday, November 16, 2012

Easy Holiday Wreath

I've always wanted to make my own wreaths for any and every holiday.  My poor front door is usually naked because I never buy wreaths...because I always think I'm going to make one but I never do.  Well I figured now is as good a time as any to try one out.  I found a bunch on Pinterest that I would love to make, but I figured I better start with a simple one.  So I found this one: Scalloped felt wreath and thought it looked simple enough so I decided to give it a try. 

For this project I used:

-a foam wreath
-red, green, and white felt (3 sheets of each color)
-craft glue
-scissors
-ribbon


I cut each color into 4 long strips (its much easier to cut that way, and we all know my struggle with cutting!) and scalloped the edges and cut them in half.  The official directions say to use a template to trace, but I just winged it!


Not too bad for those of us who are challenged with the scissors!  Once you get your colors cut out slap some glue on them and wrap them around the wreath.


Now the thing is, this really isn't that difficult to make but I found it to be super time consuming.  Cutting these out and gluing them on one by one took me a really long time.  Or maybe I'm just slow!

Once I got the whole way around I realized I made a mistake at the beginning, but luckily it was fixable.  Don't glue the scalloped edge of the first one you glue on the wreath.  It needs to be unglued, so the straight edge of the last one can be tucked underneath.  Did I explain that well enough? Probably not.  You'll see what I mean when you get to the end.  I just peeled the glued part off the wreath and stuck the last piece of felt underneath it.  To finish I wanted to do a fancy bow, but I couldn't do a nice one.  I should have bought one!

Here is the finished product:


Maybe not front door worthy, but at least bathroom door worthy!!

Sharing with
The DIY Showoff
The Dedicated House
Savvy Southern Style

Wednesday, November 14, 2012

DIY Holiday Decoration

With Thanksgiving and Christmas just around the corner, I thought I would share with you a DIY project that is simple, rustic, and beautiful.  I wanted to make something that could be used at your Thanksgiving celebration or your Christmas party or both.  And I love to bring a little bit of the outdoors, inside.  So, I gathered up a few of nature's beautiful things and got to work.   

What you will need:
Cans of different sizes
brown paper lunch bags
scissors
Mod Podge (or craft glue)
spongebrush
raffia
Pine branches


Start by removing labels from the cans.  Then, wash and dry them. 

Next, cut the paper bag vertically on one side, and then around the bottom of the bag so that you are left with a rectangle.

Then, wrap the paper around the can, leaving equal amounts of paper on both the top and bottom.  Tuck the top of the paper inside the can.  With spongebrush, spread a thin layer of glue along the seam of the paper to hold in place.  Turn the can over, and paint glue on bottom of can.


 Gather and press the paper into the glue until it has covered the bottom of the can.  (If working with Mod Podge, you may wish to brush it over entire bottom of paper to make sure it is secured in place.)


Once the glue has dried, turn the cans right side up and tie pieces of raffia in bow around the center of can. 

Place small pine branches behind the bow.


You can fill these cans with different things like pinecones or oranges.  Or you can place candles in them, but please use caution, as you will be placing fire by paper!  I used a tall votive candle holder and a short tealight.  To use extreme precaution, you can use battery operated candles. 


Or you can use these cans as your silverware and napkin holder at your next buffet style holiday dinner.  (For the silverware, I just lined the can with white tissue paper, then stood silverware inside it.)
That's it!  An easy, beautiful DIY project for the holidays!

Sharing with
The DIY Showoff
The Dedicated House
Savvy Southern Style

Monday, November 12, 2012

Favorite Things Party!

Every year around the holidays, I would wait in anticipation to see Oprah announce her favorite things for the year. I have to admit that I always dreamed of being part of her audience that day...could you imagine showing up to the Oprah Show (which is exciting enough already) only to find out that you were there for the taping of the famous favorite things show!?! So fun!! So when I was browsing Pinterest the one day and came across a pin for a favorite things party, I knew I had to have one!

I found the perfect fall invitation from this Etsy seller and had her change the wording around to work for the party. The seller sent me a file that I simply printed at Costco and sent to some of my favorite ladies.


You can see at the bottom of the invitation that each person was instructed to choose a favorite thing, no more than six dollars, and bring four of the same item to the party. When they arrived at the party, each person put their name in a bowl four times. Then the ladies took turns presenting their favorite item and pulling four names to see who would receive the item.


Some of the favorite things that were brought to the party included hand soap, garlic salt, lip gloss, candles, hand sanitizer and individual ceramic pots, among other great items. The group of ladies that attended had a great time waiting in anticipation to see whose name was called to receive each item. We joked that it looked like an episode of the Price is Right when the contestants run up screaming and yelling, which is pretty much how we all reacted when our name was called to receive a favorite thing.

In addition to the fun that we had with each person's favorite thing, we also ate and drank way too much! I took the party as an opportunity to try out some new recipes that I found on, where else, Pinterest! haha


Some of the Pinterest recipes that I made included ham and cheese sliders, pumpkin fluff dip and hot caramel apple cider (all of which can be found on my Recipes board). We also had a cheese platter made by my Mom, stuffed mushrooms made by B, vegetable pizza made by Stonf and chips and queso dip with ground meat.

In the end, I think it is safe to say that everyone had fun and went home happy! How could you not when you leave with four presents and a full belly? :)

We have all decided that this will now be an annual event...just like Oprah!

Friday, November 9, 2012

Raising a Stunt Woman

This week at my house, I have been a crazy, obsessed person.  My cat has fleas (gross!) and they are in my house (double gross). I find this pretty disgusting and also a little embarrassing, but hey what are you gonna do? It happens, I guess.  Helpful hint: If you suspect you have a flea problem, walk around in white socks.  For some reason the fleas are attracted to them and you'll be able to see if they are in your carpet.  So I have been on a pretty steady rotation of laundry, vacuuming, and spraying my house every morning and night.  At night its pretty easy, after I put my Bug to bed I take care of the other bugs.  But in the morning, its a different story.  Bug likes to be right near me no matter what I'm doing for just about the whole day. She'll try to help me and usually I don't mind.  But I mean serious business while trying to eliminate this flea problem.  Plus I don't want her near the bug spray. So it takes me about an hour to vacuum my whole house (including baseboards, that's where they hide) and that is too long for her to sit still and watch TV.  Before I start though, I do set her up pretty nicely with one of her favorite shows and some Cheerios and other snacks, but that can only keep her attention for so long. After I finish one room I'll go back and check on her, and here are some of the things I found her doing to keep herself entertained. 


I'm not too sure what she was trying to do here.  She rolled up my area rug and jumped on it.  Makeshift trampoline, perhaps?


Here she got old magazines out of a little ottoman, put them in a biiiiig pile (as she would say), and with a running start, would slide into them.  And the reason the magazines are in the ottoman is to weigh it down because she jumps off of it!


Just hanging around, waiting for Mom to finish sweeping!
 
 
Dancing on a chair...that spins...and has wheels on it!


And finally this.  She must get a better view of the TV from up there.  I have no idea how she moved that chair to the middle of the room. It's heavy!

Well there you have it.  My Bug is not afraid to try anything.  And when she does fall, she cries, but not because she got hurt.  The majority of the time she's crying because she's mad she fell off of whatever she's trying to climb/sit/jump off of.  I really won't be surprised if one day she does do some crazy stunts in the movies or joins a circus.  Sometimes I wish she would just be content to play with baby dolls or her kitchen, but then she wouldn't be my Bug! And she is the best!

What are some crazy, adventurous things your kids do? And do you make them stop or let them try things for themselves? 

Wednesday, November 7, 2012

Caption Contest!

I think this may be the best picture I have ever taken! This is from our latest get together last Friday night.  Give me your best caption in the comments below!!

Joella (Hooch's mom), Hooch, and B

Also, this is not staged this is a true live action, candid shot!

Monday, November 5, 2012

My Favorite Room

I've often discussed my love (aka obsession) of decorating my house. So today, I thought I would share with you all my favorite room in my house...my daughter's "big girl" room. I wish I had before pictures of this room, but that was pre blog and I was so anxious to change the room that I totally forgot to photograph it before I started changing things up. I can provide you with a mental picture though...think pink, stained carpet, boring white walls, and a bunch of junk in the room since this room was basically a storage area for us until it was switched to a bedroom. We used a third bedroom in our house as the nursery since it was the smaller of the three bedrooms, but we quickly realized that the nursery room would never work as a big girl room. Once she started climbing out of her crib, we got to work on making the storage bedroom into a little girl's dream room.

I wanted this room to grow with her, so I tried not to make it too young and at the same time, not too grown up for her to enjoy now. I decided on a color scheme of blue, pink and green. Let's take a look at some pictures of the finished room!


The chair in this picture was actually the chair that I had used in her nursery for feedings. It is super comfortable and works perfectly in her big girl room for reading books and sitting with her baby dolls.


The pink tufted headboard was ordered online from Target and the white bedding was found at TJ Maxx. I'm still trying to find something to go on her wall above her headboard, in between the two dress paintings that were ordered from this awesome Etsy artist. The rocking horse that you can see a peak of in the background was actually my rocking horse that my dad bought me almost 30 years ago. I love the fact that my daughter is able to enjoy it in her room just as much as I did when I was her age.

Speaking of old treasures, I reused my 1980's childhood dresser in Felicity's room by painting the shiny laminate surface an apple green color. I also spray painted the tarnished brass hardware white. I used to hate this dresser but now I love it, works perfectly in her room! The pink Swarovski "P" that is framed on the dresser was the cake topper from my wedding.


Another vintage piece that was re-purposed for this room was a frame from the 1970's. This frame used to house a painting of flowers that hung in my grandparent's house my entire childhood. When my grandparents passed away, I inherited this piece of art. Unfortunately, by the time I received the piece, the painting itself was in very bad condition. I removed the painting and spray painted the frame white. I then added ribbon to the frame and now use this piece as a place to hold Felicity's many hair bows.


In an effort to get her to sleep longer in the mornings, we installed blackout shades to the room. I personally love the function of blackout shades, but pretty much hate the look of them. I added ric-rac ribbon to each blind in an effort to make them more attractive and I have to say, I love how they turned out.


And finally, what little girl's room would be complete without a chandelier?


I hope you enjoyed the tour of my favorite room! If you would like to know source information for any other items in the room, let me know and I will do my best to provide you with the information.

What's your favorite room in your house? Let's discuss in the comments!

Sharing with:
The DIY Showoff
Home Stories from A to Z
My Uncommon Slice of Suburbia
The Dedicated House
Savvy Southern Style
Emily A. Clark

Friday, November 2, 2012

Bathroom Makeover

So when we bought this house in 2008, there was a long list of things I wanted to change/update in the house.  Now, almost 4 1/2 years later most of those things on that list are not done.   I just never seemed to have the time, and now with a little Bug constantly following me around, it is nearly impossible to even clean a room, let alone redecorate.  One of the rooms in the house that I never liked anything about is the downstairs powder room.  It was bright blue, had an ugly wallpaper border and was just outdated.  Here see for yourself.


Blagh!! And this is the bathroom that everyone who comes to my house uses, so its not some ugly room that I can hide.  So last Wednesday I was in there staring at that hideous wallpaper (I actually think its supposed to be outhouses) and I thought I'm just going to rip it down.  And there it was; my bathroom makeover began.  The difficult part was that I had to do most of it while Bug was taking a nap or asleep for the night because she was far too interested all the tools.  So it took longer than it probably should have.  So after I took down the border, I consulted with Hooch about paint colors and decided on Olympus White from Sherwin Williams.  Painting definitely took the longest.  I had to do 2 coats and the ceiling because I am a messy painter.  But luckily I had a good supervisor.


After all the paint had dried I replaced the pulls on all the cabinets,


put up a new light fixture,

 
and got a new mirror.


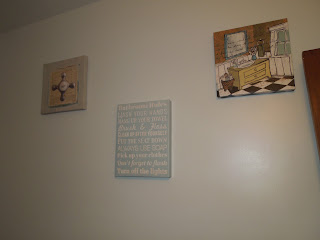
I am also attempting a gallery wall on the big wall opposite the sink/toilet, but I haven't gotten very far as of today.  This is all I got.


Pretty pathetic, right?  Hooch even found me some cute free printables, but, of course, my printer isn't working at the moment. Anyways that will be a work in progress!

So here is the finished bathroom


Seriously, its so small in there its hard to get a decent picture.  So now that I'm looking at it, I think I definitely need to do something with those cabinets.  I was hoping to get away with leaving them as they are, but now I see that they really don't match the rest of the bathroom.  Anyone have any suggestions?  Let me know in the comments!
 
 
I also need to give a special thanks to my helpers with the paint and the light. I'd still be working on both if it weren't for you two! ThankyouThankyouThankyou!!

Sharing with Savvy Southern Style and Thrifty Decor Chick